Private Drives
Diode Collab’s “Private Drives” feature allows organizations to control access to information so that it can only be accessed to certain members.
Private Drives allows a single Zone to deploy multiple “drives”, each with different team member permissions. Each drive has unlimited storage, unique permissions, and independent settings.
Read below for the different capabilities of Private Drives.
#Enabling Private Drives
In order to create a Drive, your Zone must have a plan that supports Private Drives. You can see if your Zone supports Private Drives by clicking the Zone’s setting icon, and clicking the “Plan” setting item. In the Plan setting, the Plan Features will show a line that has the “Private Drives” entitlement status. If it is set to “Enabled” your Zone can create a Private Drive!

#Accessing a Drive
For Zone that have Private Drives enabled, the file/folder area breadcrumb will always have a prefix of “Drives >” . You can click “Drives” at any time to get a list of the Private Drives you have access to.
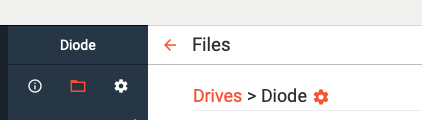
Also, you can click the Folder icon in the Quick Access bar twice, and that will toggle the file/folder view between the list of your Drives and your last used file/folder location.
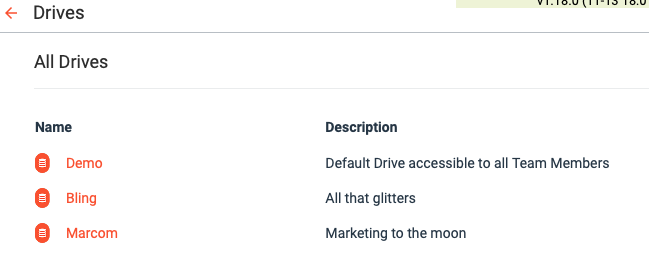
Once you are on the All Drives page, you can click a Drive to navigate into its file/folder view. The system will remember your last location, so when you return to the file/folder view, it will be where you left off.
#Creating a Drive
Only Zone Owners can create a new Drive.
To create a new Drive, go to the Drives listing (All Drives) as discussed above, and click the + button on the upper right and enter the new Drive’s name.
That’s it, you’ve created a new Drive!
Drives are anchored on the blockchain, so you should see an “Operation” icon appear in your Zone header until the blockchain registration is complete. Although you will be able to start using the Drive immediately, others won’t be able to gain access to it until the blockchain registration step has completed.
#Leaving a Drive
In order to leave a drive, access the Drive Settings area, scroll to the bottom, and click “Leave Drive”. If you are the owner, you will not be able to leave the Drive unless all other members are removed first.
Leaving a drive as the owner is the same as deleting a drive - it will become unrecoverable and files will be deleted.
#Working with files in the Drive
Multi-Drive files work just like single-Drive files. See the “Working with Files” article for details.
#Configuring the Drive
Drive settings can be accessed by accessing the Drive and clicking the gear icon to the right of the breadcrumb, or by viewing the All Drives list, selecting a drive, and clicking the gear icon in the upper right.
Although every Member can access some of the Drive settings, only Owners and Admins can configure critical Drive capabilities.
Every Drive has its own settings.
#Settings that are inherited from the Zone
Certain settings are applied to all Drives based on the Zone’s configuration. These include:
- Plan: The Zone’s plan entitlements are applied to all Drives. Any entitlements related to Drive behavior (e.g. File Backup, Web Link Quantity) will impact what capabilities the Drives can have.
- File Sync Policy: The Zone’s File Sync Policy is applied to all Drives. Read here for more information about File Sync Policy.
- Owner: The Zone’s Owner will be the owner of all Drives. If the ownership of the Zone is transferred, so will the ownership of all Drives.
#Setting: Drive Name
The Drive Name is what everyone will see the Drive named as. You can call it pretty much anything you like.
Note: the main Drive for the Zone will always be named after the Zone. You have to rename the Zone in order to rename the main Drive.
Note: when a Drive is created, the Drive name will usually become the folder name. If you change the name later, the folder name will not automatically change for existing devices. See “Location on Disk” below for how to change the folder name.
#Setting: Description
The Drive Description will be listed in the All Drives list for members who have access to the Drive. It is a short and friendly tagline describing the Drive.
#Setting: Web Links
Files that are shared via Web Link with the outside world will be listed under this setting area. See the “Working with Weblinks” article for details.
Members can access and manage Web Links.
#Setting: Drive Identification
The Drive Identification area is only visible to Admins and Owners. It shows three relevant pieces of information:
- Drive Blockchain: the logo of the blockchain on which the Drive is anchored will be shown.
- Drive Domain: every Drive (and every Zone for that matter) has a blockchain “name” that can be used to reference the Drive externally. For example, if you have a private webapp that is made accessible the Zone or Drive, the Diode CLI can be use to setup a private network perimeter so that the webapp can only be accessed by the members of the Zone or Drive. You will also see the Drive’s Domain used in Weblink URLs.
- Drive Canister: most Drives will have a Canister associated with them. Canisters are encrypted blockchain-based (Internet Computer) virtual machines that are used to cache encrypted data for your Drive so that chats, settings, and certain files are always available to members even when other members are offline. It operates as a sort of virtual “Bot”. The Canister itself is owned by your Zone’s contract, and all data in the Canister is encrypted with key material known only to Zone member devices.
#Local Settings
Local settings only impact the specific device being used - they do not impact Drive Settings for others. These Local Settings include:
- File Syncing: The local device’s File Sync setting can be set for each Drive if the Zone’s File Sync Policy allows it. See “Working with Files” for more information on the File Sync setting.
- Deleted Files Backup: You can configure a device to backup any files that are deleted from the Drive to save them in case of accidental deletion. See “Deleted FIles Backup” for more information.
- Location on Disk: You can change the location of the Drive’s files on disk with this setting. Although it is recommended that you leave the file location alone, it can be changed as long as it is on the same physical drive. We recommend you be IT capable to change this setting.
- If your Drive name is different than the Drive folder name, you can use this setting to rename the Drive folder name. You must first move the Drive to another location (e.g. the folder below the current folder), and then move the Drive back to the Zone folder -> when the Drive folder is moved, it is renamed to the Drive name if possible (e.g. if there are no other folders in the selected location with the same name).
#Deleting a Drive
Only Owners can delete a Drive.
Once a Drive has been deleted, it will be unrecoverable and all files will be lost. Be very certain you’d like to delete a Drive before doing so!
In order to delete a Drive, frist, remove all other members from the Drive. Then, go to your All Drives list, select the Drive you wish to delete, and click the trashcan icon. A popup will show to verify you’d like to delete the Drive - you can abort the mission (click cancel), or proceed.